
The process of converting a tire into a tubeless setup may not be the easiest, but it is by far one of the best upgrades you can give to your kids’ bike.
Tubeless tires typically work by creating a seal between the bike’s tire and its rim. The seal removes the need for inner tubes to keep the air within the tire. With the sealant inserted and the tire beads in place, the tire remains airtight.
But what are the benefits of running tubeless, you ask? Why would anyone want to convert their tire to tubeless?
Benefits of Running Tubeless Bike Tires
Well, there are several benefits to tubeless tires. These include:
1. Lower tire pressure
Tubeless tires run at lower pressures which translates to better traction on trails. Although lower tire pressure makes the tire prone to pinch flat, running tubeless eradicates this risk.
2. Protection from flats
It is common knowledge that the biggest and ‘most annoying’ risk to bikes is incurring flats. These can slow a trip and even dampen the mood of a ride. Tubeless come in handy in that they eliminate the risk of flats- both pinch and puncture flats.
A pinch flat occurs when the tube is pinched against the rim. This may either be the result of improper installation or a hard crash.
On the other hand, a puncture flat occurs when a tire incurs a sharp object, such as a nail or thorn, which deflates it.
When running tubeless, you are automatically protected from pinch flats, as no tube means no risk of it pinching against the rim. Additionally, you are protected from puncture flats as the sealants prevent air from getting in. And if it does seep in, you can throw in a spare tube and keep going.
3. Shedding off weight
Although not to a great extent, tubeless tires shed some weight from the bike’s overall weight. The child will most likely feel the reduced weight with each pedal stroke, especially when climbing inclines. The result is the ability to ride quicker due to the reduced strain.
Ways of Going Tubeless
There are two options for going tubeless: getting tubeless-ready wheels and tires or converting the current tires and wheels to run tubeless. Our article focuses on the latter.
Getting Tubeless-Ready Wheels and Tires
If you go with the first option, you must ensure that you have a tubeless-ready rim and tire. Tubeless tires, coupled with tubeless wheels, provide a perfect seal that holds and withstands high pressures.
There are different telltale signs for tubeless tires. The recently manufactured tires are mostly tubeless. However, to ascertain this, you need to check the writings such as Tubeless Ready, Tubeless, TLE, TCS, 2Bliss, UST (Universal System Tubeless), and TLR acronyms on the sidewalls of the tire.
The beads of the tubeless tires perfectly seat and locks on the rim, which means less sealant is required as they are airtight. As a result, tubeless tires have an airtight carcass and a fully sealed interior.
We ditched this approach to going tubeless on a kid’s bike because it is a relatively expensive upgrade. Nevertheless, it offers the advantage of easy installation and a reliable bead-to-ream seal.
Converting the current kid’s wheels and tires to run tubeless
The second and cheaper way to go tubeless is to convert whatever tire and wheels your kid have on their bike to run tubeless.
You can easily transform the wheels and tires using a tubeless conversion kit. Notably, the process of setting up the tire and wheels could either be easy or challenging. However, as long as you ensure that air cannot leak out of the rims and wheels, common in non-tubeless-ready wheels and rims, you are good to go.
For this process, you need not spend as much as when upgrading using tubeless-ready tires and rims.
We describe the process in a step-by-step detailed guide in the next section.
How to go tubeless on a kids’ bike tire in 8 simple steps
Now, let’s look at how you can convert your kid’s regular tires to tubeless.
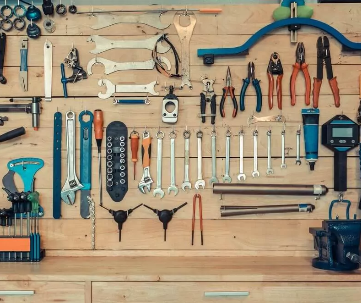
1. Gather your supplies
You will need the following to have a tire without a tube for your kids’ bike.
- Tire levers
- Gorilla tape or any other rim tape
- Tubeless valve stems
- Stan’s sealant
- Sealant injector (optional)
- Park tool valve core remover
- Utility knife or razor
- Floor pump or air compressor.
Converting the non-tubeless tries to tubeless will see them slowly leak air out of the carcass. So you need to be extra vigilant when undertaking every step.
1. Remove the tires and tubes
Start by releasing the air pressure from the tires.
Then, wedge the tire levers under the bead and pry out one side of the tires over the rim.
As you do so, be careful not to pinch the deflated tube with your lever, as it will be used later. After freeing the tire, push out the tube valve, remove the tube, then finally remove the tire.
2. Remove the existing rim tape
Usually, you will find that most wheelsets come with rim tape to protect the tube from any sharp edges, such as spoke ends.
Because we want to run tubeless, the rim tape is useless.
Loosen the rim tape from the edge or cut it off, then scrub the interior of the rim and allow it to dry.
3. Apply gorilla tape /Specific rim tape
Gorilla tape aims to cover all the holes in the rim where the spokes attach to the rim. The tape may or may not be of similar width to your wheel. As you apply the tape to the rim, smooth it and press it down as you go.
A wide roll of tape will cover the entirety and allow you to cut off the excess to the right width.
4. Insert the valve stem
After applying the rim tape, use a screwdriver or awl to make a pilot hole through the tape for the valve stem. Ensure that the hole isn’t too large, as we’ll want the bottom of the valve to seal up well against the tape.
With the pilot hole in place, remove the locking ring from the valve, insert the valve stem into the rim, and then tighten the locking ring onto the valve to hold it in position.
5. Reinstall the tire
Reinstall the tire onto the rim, starting with one bead. A ‘pop’ sound will indicate that the bead is well-seated.
Flip the tire over and install the second bead, leaving it about 1/3 unseated to pour through the sealant.
6. Add sealant
With 1/3 of the bead broken off the rim, pour in the proper sealant. This will depend on the size of your tires as well as the porousness of the material. Typically, 20-inch wheels require about 1oz. of sealant per wheel.
Once done, install the rest of the bead.
There’s an alternative method to installing the sealant, which we will explore below but if you’ve used the above method, proceed to the next step.
The sealant plays the role of stopping air from leaking under the tire bead. It also prevents air leaks through the spoke holes and the rim tape. It stays liquid until the tire is punctured and coagulates over the puncture to prevent further leaks.
7. Inflate the tire
Once the tire is in place, use a floor pump, track pump, or air compressor to inflate the tire. We prefer an air compressor as it allows a larger volume of air to be added more steadily and allow the beat to sit properly.
You can use a Park Tool valve core remover to remove the valve core. The great thing about this remover is that it makes unscrewing the valve core much easier and faster. This means there’ll be better airflow, and the tire will sit on the rim more easily.
As we’ve mentioned above, there’s an alternative method to pouring the sealant; once you’ve removed the valve core, you can use a syringe and install its filler tube onto the valve body to ease the process of pouring the sealant. Then, fill the syringe with the desired amount of sealant and force the sealant in with the syringe’s plunger.
Once the sealant is in, put the valve core back in place, rotate the tire to distribute the sealant, and guarantee a good seal.
Next, inflate the tire, remove the pump nozzle or compressor, use your finger to block the hole immediately, and reinstall the valve core securely.
You then need to spin your tire around and laterally in the air to get the sealant to adhere to the inner surfaces of the tires and inside the rim.
Note: It is advisable to inflate the tires at 60 psi and leave them undisturbed for an hour, after which you can check if they held pressure or have slightly deflated. If the tires have deflated, it is normal to top up using the compressor or track pump, spin the wheel again, and leave it to settle.
Living with and Maintaining Tubeless Tires
Deciding to run tubeless tires on your kids’ bikes will save you the trouble of pumping the tires each time they get punctured. And the good thing yet is that living with a tubeless tire is more or less the same as living with standard non-tubeless air tires.
To maintain the tubeless tires, you must constantly check the pressure before each ride. Leaking air is possible in tubeless tires, as is with conventional air-filled tires. Therefore, you need to squeeze them or measure the tire pressure using specific devices or pumps.
Apart from regularly monitoring pressure, you must top up or replace the sealant every few months. It is common for the sealant to dry out; sometimes, it even leaks during the repair of punctures or tears on the tires.
Nevertheless, if you regularly change the tires on your kids’ bikes, you will have a few maintenance sessions. Swapping the tires for summer or winter tires will make the tubeless tires last longer on your kids’ bikes.
After long use, you might notice that tubeless tires are challenging to inflate. Usually, this is because of a dried-up sealant that clogs the valve. If this befalls you, replace the valve with a new one. You can as well scrape the dried sealant with a sharp object.
Mounting the Tubeless Tires
When mounting the converted tubeless tires, ensure that you follow the steps below:
- Handle the tire levers delicately. If the levers kink the bead, the chances are that you will have air leaks. Therefore, you need to use the levers gently. You can use a soapy water solution to help you coax the tire bead over the ream.
- An air compressor or track pump helps a lot. You must inflate the tubeless tires rapidly and consistently to seat the bead on the rim. Do this to the optimal tire pressure recommended on the tire's sidewalls.
- Sometimes removing the valve core can help. From our experience, removing the valve core initially helps you fill the tire more rapidly to fully seat the tire bead on the rim. You can replace the valve once the bead sits on the rim and inflate the tire to your preferred PSI.
- Sometimes inserting a tube helps. For example, if you notice that the tire bead is not sitting well on the rim, you can try inserting a tube and leaving it inflated inside the tire overnight. This helps to reestablish the original shape of the tire.
That’s it!
At this point, ensure the tire pressure is okay, re-install the wheels onto your bike and get rolling. The two tubes you removed can serve as spares if need be.
Just like that, your kid’s bike is now tubeless! So they can have fun riding at lower pressure and lower risk of flats. Be sure to keep topping the sealant, as this is the most important level of maintenance for tubeless tires, and you’ll be good to go.
Read our beginners' guide to bike tire pressure so that if you are going tubeless for MTB, Fatbike, Roadbike, or cruiser bike for your kid, you inflate the appropriate bike tire pressure to get the right rolling resistance depending on the type of riding your kids do.
All the best!


Comments