

As a parent, it is important to understand the bike gears on kids' bikes to quickly and correctly adjust the gears on your kid's bike whenever necessary. It will also provide you with the information you need to teach your young kid how they can adjust the bike gears on their own.
The slope changes gradually and sometimes abruptly in most urban areas. Whatever change in slope one experiences when riding a bike must be followed by a proper change of bike gears to ensure your bike's "engine" adapts to the new slope without making cycling any harder.
In this post, you will discover everything you need to know about kids' bike gears, including how to adjust them.
Let's commence.
What Is the Purpose of Bike Gears?
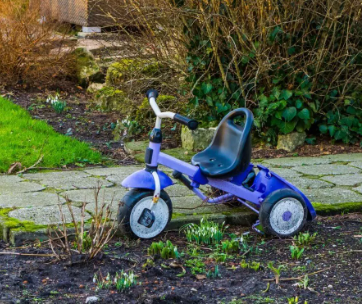
Single-speed kids' bikes are perfect for young kids. This is because of two reasons. The first reason they are perfect for young kids is that kids can use them to commute from one place to another without needing to walk or be driven there.
They are absolutely perfect in this sense. The second reason why there are perfect for young kids is that they are not complicated because they do not have bike gear. This lack of complication makes them easier to use. Kids don't need to learn about gears or how to change them before using single-speed kids' bikes.
While single-speed bikes are perfect for young kids, they are not perfect for adolescents and adults. This is especially true among adolescents and adults who are mountain bikers and road cyclists.
They are not perfect for these people because they do not allow for efficient pedaling, especially on rough or steep road patches. With urban center commuting and casual cycling, there is no need for gears because the routes taken are usually flat and do not need a lot of gear change.
In contrast, with mountain biking and serious road cycling, individuals using single-speed bikes will find it extremely difficult to pass many parts of the typical routes taken by road cyclists and mountain bikers. This is because the typical routes usually have slopes that must be climbed or descended, plus long flat stretches where energy conservation is vital. These conditions call for the use of bikes with gears.
A good bike with gears will help a cycling child climb a steep hill or section of the road without much effort. All they need to do is to shift the gear to the lowest setting (easiest peddling). A good bike with gears will also help you to descend a steep hill or section of the road much more comfortably. All you need to do is to shift the gear to the highest setting (hard peddling) for better acceleration.
From the above, it is easy to see that bike gear can be shifted to increase speed, decrease speed, reduce pedaling effort, or increase pedaling effort. Now you know the purpose of bike gears, it is time to discover how they work.
Parts of A Bike Gear (Plus Technical Terms)
You must first know the parts to understand how bike gears work to pass the knowledge to your kids. Below are the bicycle gear parts you need to know.
Drivetrain
Just like cars, bikes have a drivetrain. The drivetrain part of a bike's gear is everything that moves between the pedals and the rear wheel axle. So basically, a drivetrain can be considered another name for a bike gearbox because it encompasses everything that makes a bike's gear except the gear control knob.
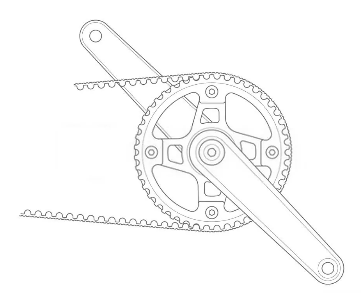
Chainrings
The chainrings engage the chain to transfer power to the rear wheel. They have teeth spaced to engage every link of the chain as it passes over. They are part of the chain set or crankset.
These are the gears that are in between the legs of the biker (the gears are directly turned by pedaling). Bikes can have one, two, or three chainrings, with the larger chain ring and the smallest chain ring. The chainrings help the cyclist climb hard and sprint fast when pedaling, whether they are riding a mountain bike, road, or gravel bike.
The turn of these gears turns the gears on the rear wheel through the bike's chain to cause movement. Some do not consider chainrings as gears since they do not directly shift other gears. However, this doesn't seem right as they turn the gears on the rear wheel via the chain connecting the two gears.
Sprockets
These are the gears that are attached to the rear wheel. They are usually smaller in size than the chainrings. When one pedals a bike, one turns the pedals and the chainrings. The turning of the chainring gears will turn the sprocket gears through a chain that connects them (the bike chain).
Cassette
Most bikes with gear have smaller gears (compared to the sprockets) located just below the sprockets (often 2 to 3 in number). This group of gears is called the cassette or the cogset. It helps to shift the gears when the rider changes gear(s) using the gear control knob on the handlebar.
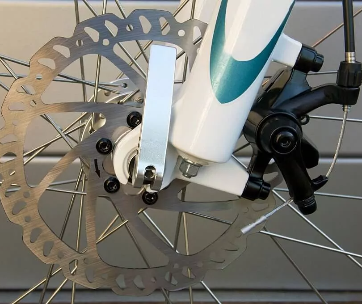
Derailleurs
This term refers to the device that shifts gear. A typical bike will have two derailleurs, and one will shift the chain from one of the chainrings to another, while the other will shift the chain from one disc on the sprocket to the next. Ensuring your derailleurs are working properly before leaving your house is crucial. Otherwise, you may discover you cannot drive during your journey.
Teeth
The chainrings and the sprockets have teeth on them. These teeth (projecting metal pieces on edge) are the ones that grip the chain. The ones on the chainring grip and move the chain, while the ones on the sprocket are gripped and moved by the chain.
Ratio
The ratio is the number of teeth on the disc gripped by the chain in the chainring versus the number of teeth on the disc gripped by the chain in the sprocket. If the number of teeth gripped at the front is 44, and the number of teeth gripped at the rear is 11, the ratio is 44 vs. 11 or 4:1. This ratio is important because it shows just how much power is generated in a gear setting. For example, if the ratio is 4:1, it means that every cycle of the front chainring (every pedal stroke) will result in four revolutions of the rear wheel.
Speed
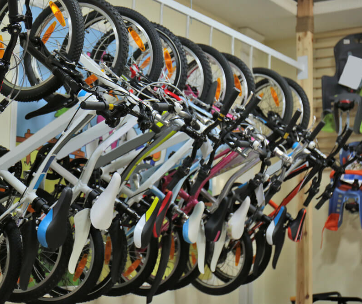
Most bikes for sale usually have a speed tag. For example, when you go to a bike shop right now and look at the bikes, you will most likely find some will be labeled "10-speed", some "15-speed", some "18-speed," and so on. These speed labels have a special meaning. 10-speed bikes are those with 10 sprockets, 15-speed bikes with 15 sprockets, and 18-speed bikes with 18 sprockets.
How Gears on a Bike Work?
Bike gears work in a straightforward yet effective way. They usually have two sets of gears or cogs – the ones between the pedals and the ones next to the rear wheel's axle. The ones between the pedals are called chainrings, while the ones next to the axle are called sprockets.
Typically, the chainrings are bigger and have more teeth than sprockets. Because of this, the chainring usually has more teeth gripping the chain than the linked sprocket in all gear combinations. The ratio between the linked chainring and sprocket will determine the number of revolutions of the sprocket and the back wheel. Since bigger chainrings have more teeth than smaller chainrings, the ratio is even higher when one of the bigger chainrings is linked to one of the smaller sprockets. This type of linking causes more revolutions of the sprocket (and back wheel) per pedaling cycle. This means the bigger the chainring, the higher the speed. Pretty simple right?
The sprockets at the back vary in size, just like the chainrings. However, rather than affect the speed like the chainrings, the sprockets affect the torque; they determine how easy or hard it will be to pedal the bicycle. Pairing one of the smaller chainrings with one of the bigger sprockets in your bicycle will reduce the gear ratio, reducing the speed but making your bike easier to pedal. It is the perfect combination for ascending a steep road or path, making it all effortless.
The opposite of this is true. Pairing one of the larger chainring with one of the smaller sprockets will increase your gear ratio and speed. While it will increase speed, making your bicycle harder to pedal.
The devices that help move or pair the chain from one chainring to another or sprocket to another are called derailleurs. The front derailleur helps to shift the chain from one chainring to another, while the rear derailleur helps to change the chain from one sprocket to another. The derailleurs move the chain from one cog to another based on the "instruction" from the gear knobs on the handlebars. Of course, the instruction is "given" by the cyclist.
Types of Bike Gear Combinations
Now that you know how bike gears work, it is time to discover the most common types of bike gear combinations.
1. Triple Bike Gear Combination
This combination has three chainrings and many sprockets at the back. The smallest chainring is usually relatively small compared to the other two. This small chainring aims to help significantly minimize pedaling difficulty, which is done by pairing it with the biggest sprocket on the bike. Triple bike gear combination is common in mountain and road bikes to make hill climbing easy.
2. Standard Double-Gear Combination
This is the most common bike gear combination on bikes. It has two chainrings, as its name (double) suggests). The two chainrings are linked to ten to twelve sprockets on the rear wheel axle. Most bikes have this gear combination because two chainrings are lighter than three and because the two are usually enough for regular bikes for casual riding or commuting. These bikes do not need a third chainring for ascending hills.
3. Compact Bike Gear Combination
A compact bike gear combination is the perfect bike gear combination for competitive cycling. It has two chainrings, just like the standard double-gear combination, and the only difference is that its chainrings are smaller hence its name (compact). The smaller chainrings on compact bike gear combinations make the gear lighter, and this weight reduction makes the compact bike gear combination perfect for competitive cycling. The smaller chainrings are small enough to reduce weight for competition but also big enough for high-speed descents and big climbs.
How Kids can Enjoy using Gears on their Bikes
Now that you understand everything necessary about bike gears, it is time to discover how to use them. In this section, we will reveal valuable tips you can use to master how to use bike gear.
1. Check YouTube videos on how to shift gears
You can find a video on just about anything on YouTube. The social media site hosts billions of videos.
You can search YouTube for videos on the topic to learn how to use bike gears.
Within moments, you will see several quality videos you can watch and familiarize yourself with what you need to do to change gears and what to expect when changing gears.
2. Practice, practice, practice
The most important thing you need to do to understand how to use bike gear entirely is to practice. You should practice changing bike gears as often as possible until you are quite familiar with changing both front and rear gears.
Practicing on a stationary bike will not be helpful as you won't fully understand and appreciate how the gears change. So, you should make an effort to practice on a moving bike. Get an adult bike with gears and use it to practice changing gears.
Within a few weeks of practicing, you should be familiar with bike gears and how they work. When practicing, you should shift the gears gradually because shifting them significantly won't let you fully appreciate how bike gears work.
3. Understand the basics of chainring-sprocket pairing
Smaller chainrings – bigger sprockets pairings make pedaling easy. These pairings are perfect for hill climbing, riding against strong winds, and starting from a standstill. Bigger chainrings – smaller sprockets pairings make pedaling harder but increase speed and momentum.
These pairings are perfect for 'tearing the road' and accelerating on descents. By understanding these chainring-sprocket pairings, you should be able to master bike gears quickly.
4. Prepare to shift early
You must prepare to shift early to make your gear-changing experience much better.
Failure to prepare to shift early could make you struggle in places you do not need to. So, observe the road and prepare to shift early. Once you notice that you need to upshift for a certain section of the road, start doing it early so that you are in the right gear by the time you start the descent.
If you need to downshift, start doing it early so that you are in the right gear by the time you start climbing. Anticipating shifting will make your cycling experience very pleasant.
5. Avoid cross-chaining
Cross-chaining is the creation of an extreme slant in the bike chain. This happens when you pair the biggest chainring to the biggest sprocket or when you pair the smallest chainring to the smallest sprocket.
Cross-chaining is usually unnecessary, and only kids do this. You can achieve anything you want with your bike's gear without cross-chaining.
Therefore, you should avoid doing it as the only thing it does is that it creates an extreme slant and strain on the chain. Continued cross-chaining can result in chain break or failure, and it could also cause damage to your bike system.
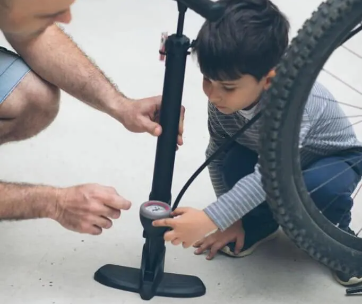
6. Regular maintenance
Regular maintenance is one of the most vital things you need to do to ensure your bike's gears are working well.
Bike gears that are not regularly maintained will not work well. In contrast, those that are periodically maintained usually work very well. Therefore, you should make it your mission to maintain your bike's gears regularly. You can do this by cleaning the gears and oiling them.
You may need to take your bike to a mechanic once to see how it is done. Doing this will expose you to the correct way to clean and maintain bike gears, and once you get this exposure, you can do it yourself very effectively.
How to Teach Your Kid How to Use Bike Gears
At this point, you know everything necessary about bike gears, including how to use bike gears.
In this section, you will learn more about teaching your child how to use bike gear. This information should make it easy to educate your kid about the basics of kids' bike gears.
1. Explain to Them the Different Parts of Bike Gears
Your kid might not understand everything you show and explain to them about the gears, but they will certainly have a rough understanding of how the gears work.
Explain and show them how to use shifters or gear levers and change the gears when pedaling. Insist that changing gears when stationary is not a good idea as it doesn't do anything.
This will enable them to take good care of the gears and build a foundational understanding of their operation. With time, they will understand everything.
2. Teach them about Braking
While teaching your kid about the gears, you should also teach them about the brakes.
Why is it important to teach your kids about the brakes when you are teaching them about the gears?
It is important because once your kid masters how to use the gears, they will tear the streets and the roads at light speed. Therefore, it is crucial to remind them how to use the brakes.
You should remind them to use only the right-hand side brake for emergencies and never on its own.
You should also remind them of the usefulness of the left-hand side brake, particularly in slowing down the bike.
3. Explain and Demonstrate how to use Gears when in Motion
You should teach your kid this lesson to enable them to use the gears effectively. Teach them how to adjust the gears to accelerate and how to adjust them to decelerate.
You can do this by lifting the back wheel off the ground, pedaling the bike by hand, and showing them how to change the gears when accelerating and slowing down using the gear.
If it is a grip shift, demonstrate how to twist forward to harder gears and backward for lower gears. If it is shifters, teach them to use the big thumb for easy and the little finger for harder gears.
Also, teach them to shift to low gear to reduce pedaling difficulty. These are the most important lessons your kid needs to learn regarding bike gear.
The best way to teach them is to show them. Let your kid hop onto the bike and teach them how to shift the gears by telling them exactly how.
Follow them around as they experience acceleration, deceleration, and a decrease in pedaling difficulty. Help them shift correctly and help them balance. Several hours of practice spread over a few days will allow them to master the gears.
While at it, insist they must focus on where they are going and not the gears as they shift. They should also maintain a smooth pedaling technique and release pressure slightly on the pedals when changing the gears, stay seated, and shift through one gear at a time when maintaining the same pedaling rhythm.
4. Static? Changing Gears will be Useless!
Most kids don't know that bike gears cannot be changed when a bike is static. Sometimes they destroy their bikes trying to change the gears manually once they notice no chain shift has occurred despite the movement of derailleurs.
Therefore, you must tell your kid they cannot shift gears when their bike is stationary. Tel, and tell only to change the gear
5. Practice Makes Perfect!
You can set the bike in an easy gear, forget about the number of gears the bike is in and keep watching how the kid progresses. If you think they need harder, instruct them to go down one gear at the back so that they get used to changing gears while on the go.
Once the child is confident changing gears while pedaling the bike, explain the gear numbers and their meaning.
For instance, you can tell then gear number 1 is a low gear and it is used to get up the hills, and the highest gear (depending on the cassette) is, say, 10 or 11, and it is the hardest that is used when someone wants to go fast down or on flat ground.
Get them accustomed to the numbers on the shifter and, this time, use the gears' numbers instead of hard or easy.
Ensure that they move up or down one gear at a time. Be patient when teaching the kids because some might take time to understand gears, but that's the ultimate goal anyway.
All you can do is praise them every time they make a milestone. It is not an overnight affair, so prepare for disappointments, which are part of learning. Lowering your expectations would be good, so you don't put too much pressure on the child.
It would be a good idea if you could find a slight slope because you will show them how to apply hard and easy gears when going down and up, respectively. They can also try some harder gears going up, especially when off-saddling, and use easier ones when going down to make them find the gears that they are comfortable riding uphill and downhill in, depending on how their legs feel.
Before you Close the Tab….
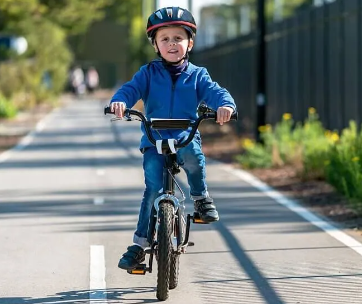
A bicycle with gears is easier to pedal than a single-speed bike. Kids will find it easier to use low gears when pedaling up big hills and higher gears when riding back down or cruising through flat surfaces. Kids should know that bicycle gears make cycling easier, and the feeling when one does proper shifting is otherworldly. Once kids understand what gears mean on bikes, they are good to go.
It is important to teach kids how to use the gear levers on their bikes' handlebars to change the gears on their bikes: mostly, the left lever changes the front gears, and the right lever changes the rear gears. Let them know how to use all the gears on a bike. For instance, help them understand the significance of using the big and smallest chainrings on their bikes. Equally, help them know how to use shift levers, grip, or twist shifters if their bikes have them.
Understanding the gears is a major cycling technique. When a kid develops interest and learns how to change gears at the right place and time, they gain an experience of a lifetime they can carry through to become iron men or even pro cyclists.
When the cyclist spins the pedals quickly, they are in low gear instead of when pedaling slowly and in high gear.
We hope this resource on fundamental mechanical functions of gears on a bike will help you train your child to use the right combination of gears on their bikes. We have the gears explained and essential information, and the steps you will need. All the best!


Comments